Selectric Resources
MARGINS AND LINELOCK ADJUSTMENTS
NOTE: Dual pitch margin adjustments are slightly different. See Switch Pitch Adjustments section of this manual.
1. Margin Rack Horizontal — The margin rack must rest on a horizontal plane.
a. Level I — 7X1, 7X3, And 7X5 — Adjust margin release lever.
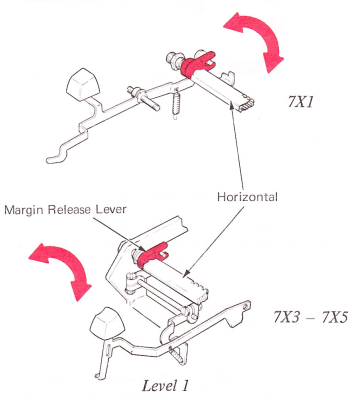
b. Level 2 — 7X1 Only — Form margin release lever stop. On 7X3 and 7X5 machines adjust the margin release lever for 1/32” (0.79 mm) engagement with the margin stop.
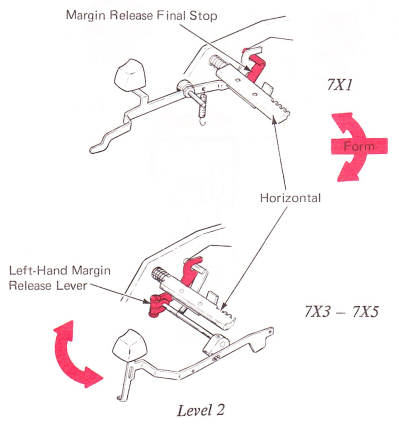
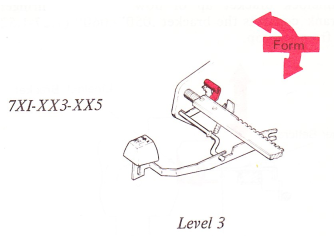
c. Level 3 — 7X1, XX3, XX5 — Form margin release final stop.
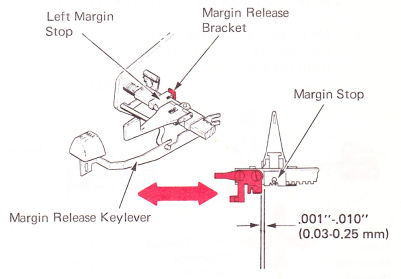
2. Left-Hand Final Stop —
a. (NRB/S) — Position the margin release bracket left to right on the margin rack so it will clear the margin stop by .001”-.010”(0.03-0.25 mm) when the margin stop slider is fully bottomed in the far left-hand tooth of the margin rack.
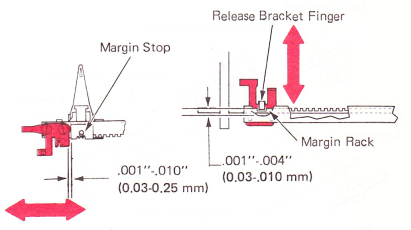
b. (RB/S) — Position the margin release bracket left to right on the margin rail so it will clear the margin stop by .001”-.010”(0.03-0.25 mm) when the margin slider is fully bottomed in the far left-hand tooth of the margin rack, also position it front to rear for .001”-.004” (0.03-.010 mm) clearance between the finger on the release bracket and the slot in the margin rack.
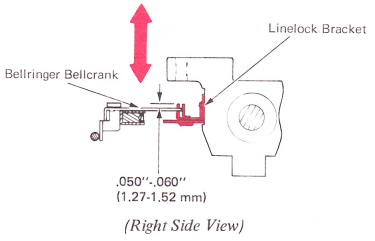
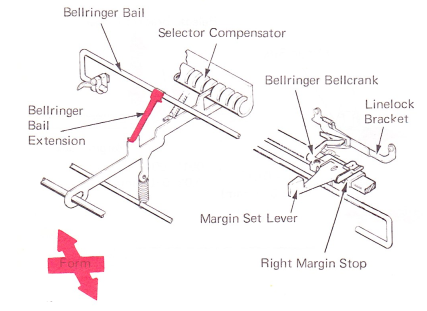
3. Linelock Bracket — With the carrier at the left, adjust the linelock bracket up or down so the bellringer bellcrank contacts the bracket .050”-.060” (1.27-1.52 mm) from the top.
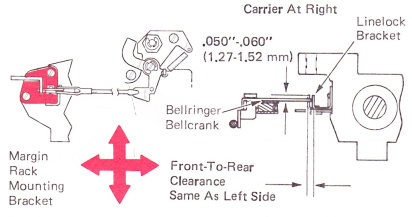
4. With the carrier at the far right, adjust the margin rack mounting mounting bracket for two conditions:
a. Front To Rear — To contact the linelock bracket as observed with the carrier at the far left.
b. Up Or Down — So the bellringer bellcrank contacts the linelock bracket .050”-.060” (1.27-1.52 mm) from the top.
5. Bellringer Bail Extension — Form the bellringer bail extension up or down so the character keybuttons lock when the red pointer is directly above the right-hand margin set lever.
CAUTION: The linelock should not bind in the space before the desired locking point.
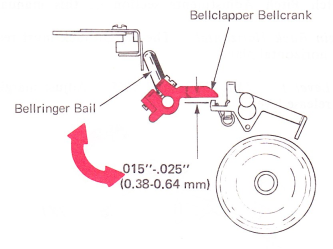
6. Bellclapper Bellcrank — Adjust the bellclapper bellcrank on the bellringer bail so the bellcrank clears the spring by .015”-.025” (0.38-0.64 mm).
7. Carrier Pointer — Set the left margin stop at the first tooth of the margin rack and position the carrier at the left margin. Position the pointer for the following conditions:
a. (Levels 1, 2 And 3) — Left to right so the the pointer is aligned with the zero poistion on the margin scale.
b. (Level 2) — Up or down for equal clearance between the left margin lever and the margin scale.
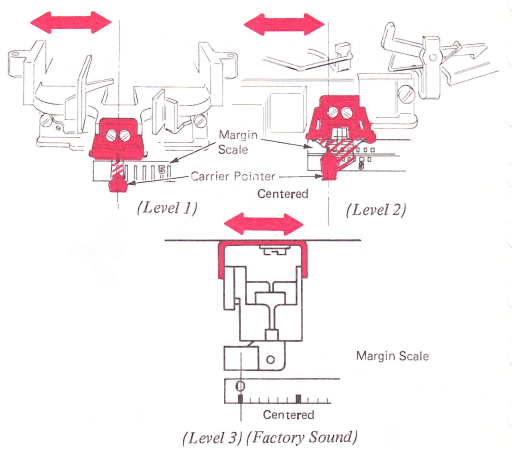
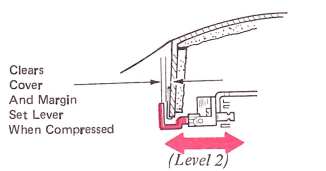
c. (Level 2) — Front to rear to clear the margin scale and the margin set lever (margin lever compressed to rear) equally.
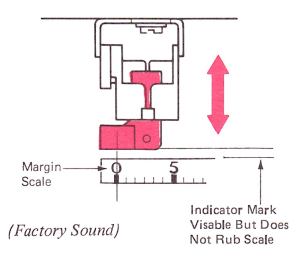
d. (Level 3, Factory Sound) — Front to rear so the indicator mark is visible through the margin scale but does not touch the scale.